
Saws
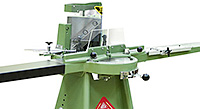
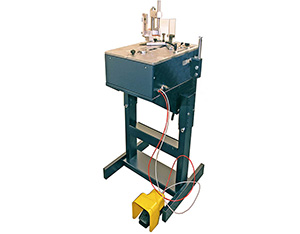
IM30 Single Mitre Saw 9:03
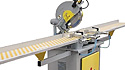
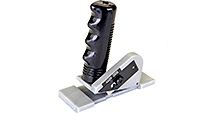
The IM30 miter saw is particularly suitable for cutting frames at 45 ° or other intermediate angles.

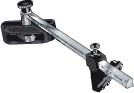
Adjustable pneumatic horizontal clamps to firmly hold moulding 2:26
Interesting optional of the IM30 saw to keep the moulding pressed during the cut

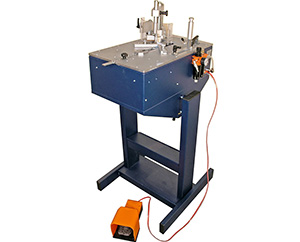
Mitre Saw Pegic GP350 11:48
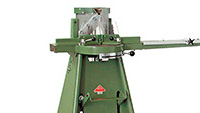
The GP350 mitre saw is used for the cut at 45°, at 90° and other intermediate angles.
It works with 350 mm diametre blades. Can cut up to 11 cm large mouldings.
It is very robust and has innovative technical solutions.

Double Mitre saw Alfamacchine T400 4:21
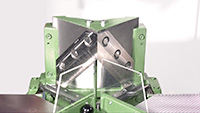
This double blade mitre saw Alfamacchine T400 is needed to cut mouldings at a fixed degree of 45°.
It’s provided with a diagrammed plane with a supporting surface and a pneumatic mobile stop.
Two pressure plates adapt automatically to the shape of the moulding.
Guillotines
Guillotine Morso model F - DeLuxe - F+10 14:16
The pedal guillotine Morso is needed to cut the pieces of the frame at 45°. The advantages of the guillotine: it doesn't make noise, it doesn't produce dust, it doesn't use electric energy, in a single process it executes the right and left cut.
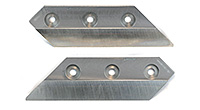
The knives of the guillotine 4:52
The video describes the blades with their characteristics provided by Rinaldin for the guillotine.
Changing the blades of the guillotine 6:20
Changing the blades of the guillotine.
Interesting also for expert framers to look at, so see if we show alternative methods.
The guillotine - 10 tricks of the trade 7:51
A few tips and advices to help you use the guillotine at its best.
It might also interest expert framers.
Underpinners
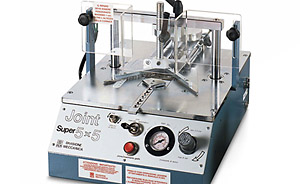
Underpinner Joint 5x5A and Joint 5x5 Super 12:13
The pneumatic underpinner Joint 5x5 Super is needed to join the pieces of a frame. The underpinner Joint 5x5A is a model which is less automatic than the 5x5 Super.

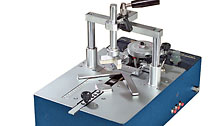
Underpinner Minigraf U200 12:38
The A2M underpinner, manufactured in Italy by Alfamacchine, is needed to assemble frames. It does not require a compressor. Suitable for novices, photographers and artists.
Very easy to use. Maximum moulding width 13 cm.
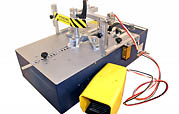
Underpinner U300 12:22
The pneumatic underpinner U300 is needed to professionally assemble the pieces of the frame.
Pneumatic Underpinner U300P with 3 positions 13:31
The pneumatic underpinner U300P is particularly apt for the framer who produces frames in a series.
The time to set the machine for the first frame is much longer than for other underpinners. The performance time however is much faster.
Underpinner U400 13:40
The pneumatic underpinner U400 is needed to join the pieces of the frame.
It includes the basement.
Suitable for framers with a good volume work.
The main characteristics of the U400 are the series of metallic chargers and the possibility of joining very wide frames.
Pneumatic underpinner U400S 15:00
The pneumatic underpinner U400S, manufactured in Italy by Alfamacchine, is needed to assemble the pieces of a frame. It is provided with an inclination adjustable base.
Glass Working
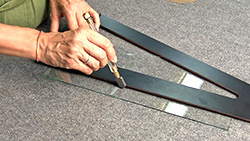
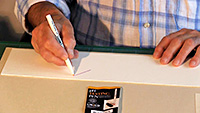
Glass cutting 3:55
The video shows how to cut glass using a glass cutter and a glass square.

Extendable Support for glass cleaning 3:51
It is for cleaning glass in a very rational way. It is made up of fillets in PVC fixed to each other at the joints so as to be extendable and then closed again easily. Rubber bumpons hold the glass still, so it is unnecessary to hold the glass with your hands.
Glass Cutter CircleMate by Fletcher 4:31
The Glass cutter CircleMate by Fletcher has two functions: cutting glass into circles and cutting glass sheets longitudinally.
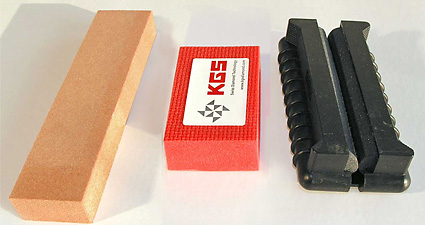
Tools for grinding glass 3:16
Tools for grinding glass: carborundum file, diamond pad and cylindrical grinders.
Mount Cutting
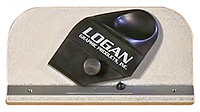
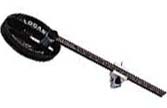
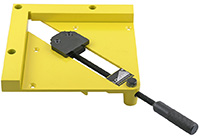
Logan 2000 Push Style Bevel Cutter 3:25
The push-style Logan 2000 mat cutter is used to cut bevel matboards. Cut is done by pulling the cutter.
Guide marks help you to minimaze overcutting at the corners.
Depth of the blade. adjustable. Uses blades L270
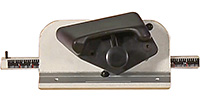
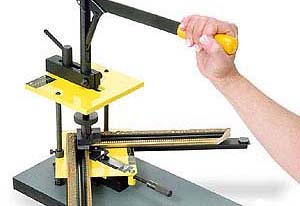
Logan 4000 Deluxe Pull Style Bevel Cutter 3:29
The pull-style Logan 4000 mat cutter is used to cut bevel matboards.
Cut is done by pulling the cutter. Measuring bar with pencil led.
Depth of the blade adjustable. Uses blades L270
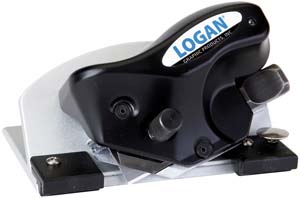
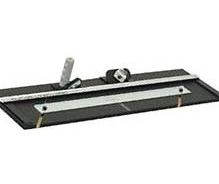
Logan 5000 Mat Cutter for thick mountboards 3:41
The Logan 5000 is used to cut normal and thick matboards.
It works with L270 or L271 blades.
Matchable with Logan L301 - L450 - L750 - L760 cutters and with the L540 and L560 rulers.
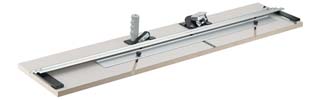
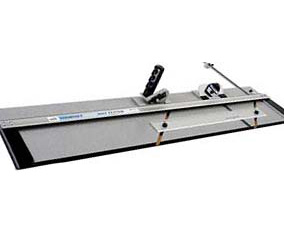
Logan 450 Mat Cutter 7:13
The Logan 450 Mat Cutter is used to cut matboards.
Downsize matboard up to 29 1/2" (102 cm). Includes parallel mat guide, mat guide, L4000 bevel cutter and L7011 straight cutting head. It works with L270 Logan blades.
Suitable for artists, hobbiests and framers with a small volume work.
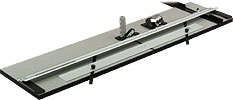
Logan 750 and 760 Mat Cutters 13:15
The Logan 750 and 760 Cutters are used to cut maboards.
They are composed of the solid base with laminated surface, the square, the parallel guide, double cutting stop, the head for 45° cuts and the head for 90° cuts. The maximum cutting length of the L750 cutter is 101 cm. The maximum cutting length of the L760 cutter is 152 cm.
Suitable for artists and photographers.
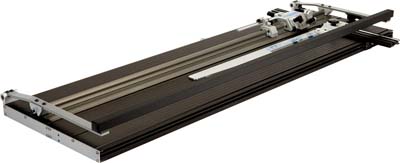
Logan L850 - L855 - L860 Mat Cutters 8:08
The Logan 850 - 855 - 860 Cutters of the "Logan Platinum Plus" Series are professional cutters for maboards.
Available in three sizes: L850 102 cm cut - L855 122 cm cut - L860 152 cm cut.
The Logan Platinum Plus cutters work with L267C blades.
Ultimat Futura Mountboard Cutter 2:00
Ultimat Futura Mountboard Cutter, manufactured by KeenCut, is an accurate and efficient cutter even on the toughest mountboards.
Cutter Logan 7011 for 90° cut 1:47
The Cutter 7011 by Logan is used for 90° cut of mat and foamboard.
Mount Decoration
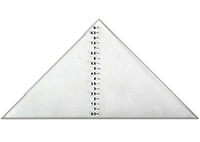
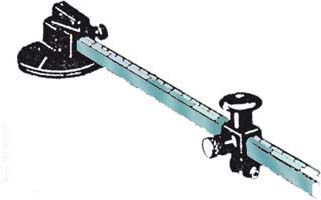
Matboard square 5:50
It is used to mark the guide lines for cutting the matboards and to mark guides for the decorations.
How to increase the depth of the mountboard 7:05
How to increase the mountboard's depth by using foamboard covered with decorative self adhesive tape.
Cutters for ovals and rounds
Oval/Circle Logan 201 Mat Cutter 4:17
The Logan 201 Mat Cutter, manufactured by Logan, is used to cut oval and round matboards.
Cuts bevel openings: ovals from 7x11 cm to 51x58 cm. Maximum difference between oval width and oval height is 8 cm.
Suitable for hobby.
Oval-Circle Matboard Cutter 5:45
The "Oval-Circle" cutter manufactured in the USA by Fletcher is used for cutting mountboard either in circles or ovals.
Cardboard Cutter
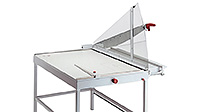
Cardboard Cutter Ideal 1110 6:00
The German board cutter Ideal 1110 can cut board, carton, paper, textiles etc.
The maximum thickness of the material is of approximately 4 mm. The cutting light is 111 cm.
It has a small pedal presser, a supporting surface, a diagramed scale, an overturning surface that can be added, a device to cut thin strips.
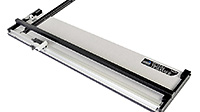
Cutter Logan Total Trimmer 3:29
The Total Trimmer is a cutter that can cut any material: foam board, cardboard, corrugated cardboard, mat.
The maximum thickness of the sheet to be cut is 13 mm.
Cutting length of 152 cm. Works with L267C blades.
Vertical Cutters

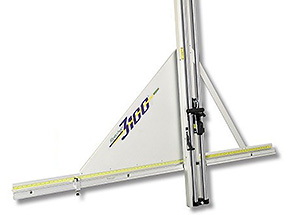
Vertical Cutter Gladium 8:42
The vertical cutter Gladium is used to vertically cut various materials such as cardboard, mountboard, glass, plastic glass, polystyrene foam etc.
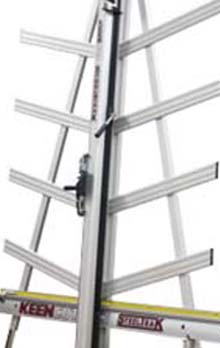
Vertical Cutter SteelTrak 2:45
The vertical cutter SteelTrak produced by Keencut can cut different material such as cardboard, hardboard, masonite, MDF, aluminum, polystyrene, PVC, glass.
Vertical cutter Fletcher 3100 4:32
The vertical cutter F3100 can cut almost all materials: glass, cardboard, MDF, foam board, plastic materials and so on.
Punching Machines
Fixing Machine Champ4 for hinges and hangers 9:21
The Champ4 fixing machine, manufactured in the USA by Craft, is used to fix hangers to the back of the frame and to fix hinges between the photoback and the strut.
Fixing machine SH200 8:16
The SH200 punching machine has the function to apply the hanger to the support of the frame.
Dry Mounting and Laminating
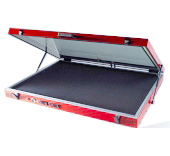
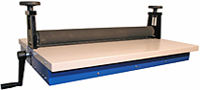
Vacuum Pressa: Hot Glass Vacuum Press 10:28
The Hot Glass Vacuum Press is needed to dry mount a poster to a carton in a rational way.
It is possible also to apply a protective or decorative film.
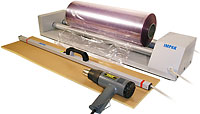
Manual Laminator Zenith 10:35
The manual Zenith laminator is needed to mount and laminate.
It's essentially made up of 2 rolls through which the material to be mounted or laminated is passed through.
Laminating can be made with different kind of films to obtain an opaque, glossy or satin effect.
Canvas Stretching
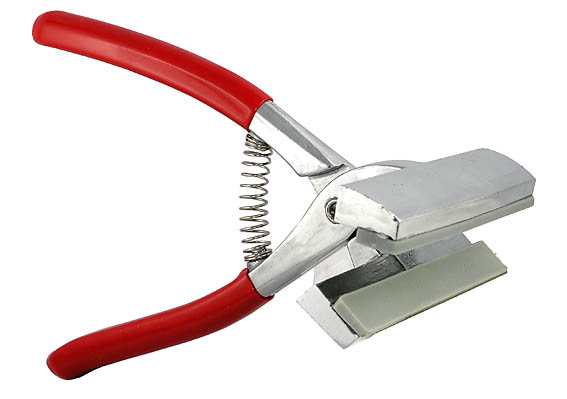
Stretcher Pliers for canvas 7:05
The stretcher pliers for canvas is an instrument which helps to stretch the canvas and fix it to the stretchers. The video shows how the stretcher pliers.
Tendy Canvas Stretcher 7:17
The pneumatic canvas stretcher "Tendy" is used to fix the canvas to the frame.
It needs a compressor and a pneumatic fixing gun.
Various Machines
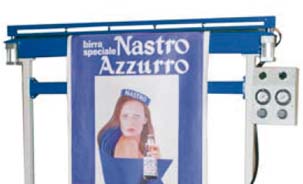
Impak wrapping system 6:07
Impak's wrapping system is needed to wrap and protect frames and other objects with a transparent PVC film.
Workshop Equipment
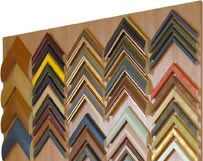
Display System for frame corner samples 7:40
The system consists of a series of panels fixed together to form one long panel on the wall. Every panel has vertical rows of holes into which plastic hangers are inserted which support the samples. One of the advantages is the possibility to reconstruct the display very quickly or replace models that are running out.
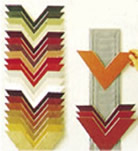
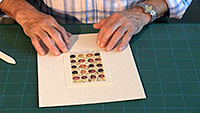
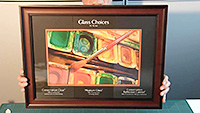
Display Panel for mount corner samples 2:15
It is made up of a panel with 20 little horizontal strips into which the samples are inserted. The panel can be hung on the wall or stand on the shop counter.
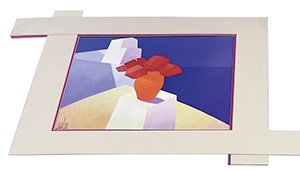
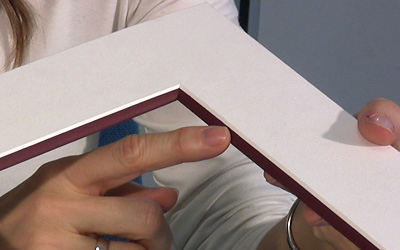
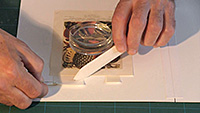
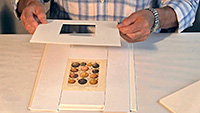
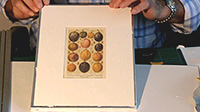
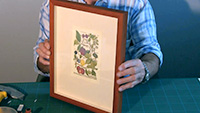
Expandable matboard with a fillet 3:09
The expandable mat with a filet allows the customer to see what the framed picture will look like.
The video also explains how to make the expandable mat yourself.
Picture Hanging System

Picture hanging systems: Click Rail, Click Rail Pro, Top Rail 7:16
Hanging systems without the need of making holes in the walls.
Suitable for for galleries and expositons where the frames have to be frequently replaced.
Click Rail, Click Rail Pro, Top Rail are used.

Classic Rail System for hanging frames 3:44
It is a system for hanging frames without making holes in the wall.
Suitable for galleries and exhibitions where the frames have to be changed frequently.
You use Classic Rails and Classic Rail Plus.
Contour Rail System for hanging frames 2:05
Contour Rail is an innovative system for hanging frames.
Composed of a rail, vertical very thin wires and the brand new Micro Grip.
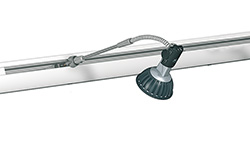
System for hanging and lighting pictures: Combi Rail Pro Light 2:31
This system, produced by the Dutch manufacturer Artiteq, is used for hanging and lighting pictures.
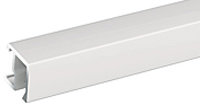
Deco Rail System for hanging frames 2:32
The system Deco Rail is made up of an aluminum rail on which a decorative frame is placed.
On the rail you apply wires which support hooks and frames.
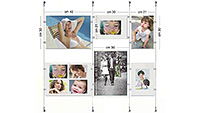
Display-it system 2:27
The Display-it system is an elegant way ofIt is composed of the plexiglass holders, the steel vertical wires and finzing clips exhibiting photographs.
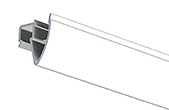
Up Rail Hanging System 1:30
The Up Rail Hanging System is composed of a rail applied to the ceiling with proper accessories.
You will hang wires to the rail, bearing hooks and pictures.
Photobacks
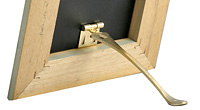
Curl Up and Kiasu Easels: 1 - Kiasu Model 3:16
Kiasu is an elegant easel system for photo frames.
The video describes how it works and suggests the best solutions.
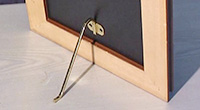
Curl Up and Kiasu Easels: 2 - Curl Up Model 6:26
Curl Up is an elegant easel system for photo frames.
The video describes how it works and suggests the best solutions.
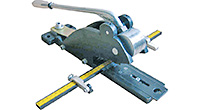
Curl Up and Kiasu Easels: 3 - Mighty Mouse Fixing Machine 2:13
Mighty Mouse is a tool which is used to attach the brackets used in the ‘Curl Up’ system, to the backing board.
The video describes how it works.
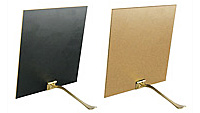
Curl Up and Kiasu Easels: 4 - Backing Boards 2:11
The video shows how to use the backing boards with the "Kiasu" and "Curl Up" Easel System.
Tools for foamboard
Logan WC6001 Foamboard Cutter 2:10
The WC6001 Cutter, manufactured by Logan, is used to make straight 90° cuts on foamboard, till a maximum depth of 12 mm.
Adjustable blade depth.

Rabbet Cutter for foamboard 1:49
Used to obtain a special cutting on the border of foamboard to facilitate the corner jonction of two boards.
Suitable also for left-handed. It works by pushing or pulling it.

Cutter Logan Hole Drill to obtain 3 round holes 2:17
The Hole Drill by Logan is used to obtain round holes of 3 sizes in the foamboard.
Various Tools
Centering Tool 2:19
Used to rapidly find the centre of the side of the frame where the hanger will be applied.
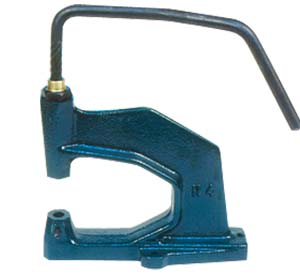
Hand operated Rivet Machine 2:08
The hand operated rivet machine is needed to fix certain hangers to a carton or of other similar materials, support.
Particularly useful to fix the hanger to the back of clip frames.
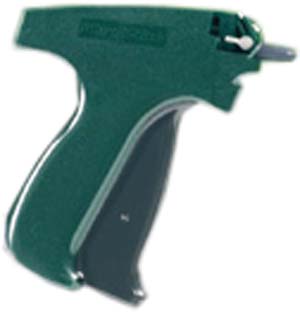
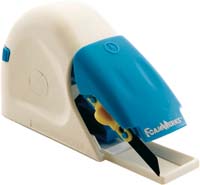
MicroStitch Fastening Gun to mount fabrics 2:33
The MicroStitch gun allows you to quickly and accurately mount fabrics or canvas to the frame support. The special gun fires nylon strips penetreting the cardboard (or other support) and fixing the fabric.
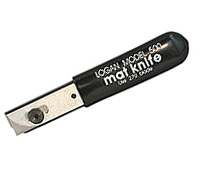
Logan 500 Mat Knife 2:14
The mat knife Logan 500 is used to cut at 90° hardboard, matboards, foamboard etc.
The depth of blade is ajustable. Uses blades L270.
Home & Hobby Framing
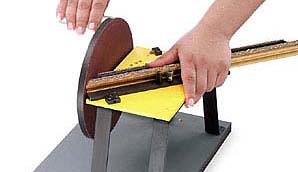
Precision Sander Logan F200-2 3:31
The manual precision sander Logan F200-2 is used to obtain a smooth finish of the 45° cut of the 4 pieces of the frame before assembling them.
The maximum moulding width to sand is 60 mm.
Diameter of the disc 21 cm. Weight 5 Kg.
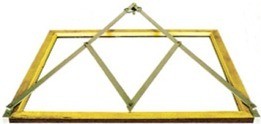
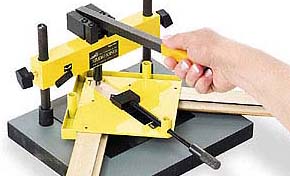
PFK04 Frame Joining Kit 3:16
The PFK04 Frame Joining Kit, manufactured by Framers Corner, is used to join the 4 corners of the frame.
Drives all single v-nail, that can be superimposed.
Suitable for beginners and hobbysts.
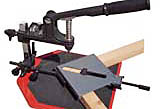
Underpinner F300-1 Logan Studio Joiner 5:28
The underpinner Studio Joiner, manufactured by Logan, is used to join the 4 corners of the frame.
The moulding is fixed upside down.
Drives all single v-nail.
Maximum width of the moulding: 6 cm.
Suitable for beginners and hobbysts.
Clamp Logan F49 3:26
Clamp to hold blocked the two pieces of mouldig cut at 45° by using the wedges.
Suitable for hobbiests. The clamp is a part of the joiner Studio Joiner and Pro Joiner but can also be used separately from the joiner.
Underpinner F300-2 Logan Pro Joiner 4:47
The underpinner Pro Joiner, manufactured by Logan, is used to join the 4 corners of the frame.
The moulding is fixed upside down. Maximum width of the moulding: 6 cm.
Drives all single v-nail, that can be superimposed.
Maximum width of the moulding: 6 cm.
Suitable for beginners and hobbysts.
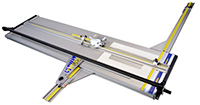
Logan 301 Mat Cutter 4:25
The Logan 301 Mat Cutter 301 is used to cut matboards.
Downsize matboard up to 73 cm. It is composed of cutting board, cutting guide, cutting head L2000 and cutter L500 for cut at 90°.
Works with blades L270.
Suitable for artists and hobbiests.
Logan 350 Mat Cutter 6:44
The Logan 350 Mat Cutter is used to cut matboards.
Maximum cutting length 81 cm
Composed of a cutting base, a parallel mat guide, a head for 45° cuts and a head for 90° cuts.
Works with L270 blades.
Suitable for photographers, artists, hobbiests and framers with a small volume work.
Gilding Course

Gilding course: Introduction to gilding 10:06
Introductory video to the gilding course, which gives basic knowledge on water gilding and size gilding.
We advise you to study the full gilding course composed of 11 videos.
The course is for framers who want to delve into the topic of gilding. It is also for those who want to practice gilding as a hobby.
The videos also provide instructions on how to use all gilding products provided by the Rinaldin.
Gilding course: 1 - Gesso 9:29
The first phase of gilding is applying the gesso.
Gesso and rabbit skin glue must be mixed together and then applied. At the end you must sand the surface.
Gilding course: 2 - Bole 4:50
Bole is needed to prepare the surface for the application of the gold and silver leaf.
You must apply several layers on the gesso. When it has dried, it must be sanded and polished.
Gilding course: 3 - Acrylic bole 4:19
The acrylic bole is an alternative product which substitutes the gesso and rabbit skin glue mixture. It is used for water gilding. It is available both white and coloured.
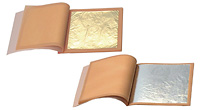
Gilding course: 4 - Gold and real silver leaf 12:14
The video shows in detail the sequence of the application of the gold leaf and real silver.
It shows also the burnishing of the leaf.
Gilding course: 5 - Size 5:38
The size is a liquid which after a while that it's been applied it becomes sticky so that the imitation leaf can be applied.
It must be applied on the gesso after the shellac. The video shows various kinds of size.

Gilding course: 6 - Imitation leaf 8:04
The video shows different kinds of imitation leaves: gold, silver, copper.
It shows how to handle and apply it on the fram
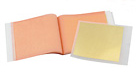
Gilding course: 7 - Gold leaf in transfer leaves 3:55
The transfer gold is gold that's been pressed against a thin tissue paper.
The video shows how to apply it to the frame.
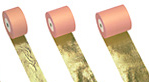
Gilding course: 8 - Imitation gold leaf in rolls 5:14
The roll gold leaf is particularly suitable for gilding fillets on mouldings. The video shows how.
Gilding course: 9 - Finishes 4:23
The video shows how to age a frame by a bitumen wax or the bitumen of Judea.
It also shows how to make a golden frame from a silver frame.

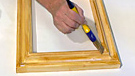
Gilding course: 10 - Decorative engravings 3:34
Decorative engravings are funny and easy to make.
The video shows how to gild a frame and make a decorative engraving.
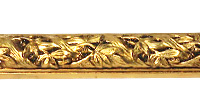
Gilding course: 11 - Gilding in relief 2:36
The video shows how to make gilding on decorative ornaments made of a proper paste.
Conservation Framing
Conservation Framing: 1 - Principles 5:51
The video explain what is the conservation framing, its principles and its main features.
Conservation Framing: 2 - The pH scale - Mountboards 4:00
The pH scale is important in conservation framing.
The video explains the pH scale and the relation between pH and mountboards.
Conservation Framing: 3 - The Mount Package and Mounting of the artwork 4:06
This video explains how to mount the artwork on the undermount using the T-hinges.
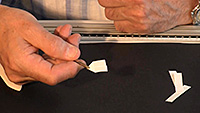
Conservation Framing: 4 - Corner Pockets - manual 4:26
How to prepare yourself the corner pockets that serve to support the framework without tapes.
In conservative framing the sef-adhesive tapes are not accepted.
Conservation Framing: 5 - Corner Pockets - ready made 4:37
Pressure adhesive tapes are not allowed in conservation framing. This video explains the use of corner pockets to mount the artwork on the undermount.
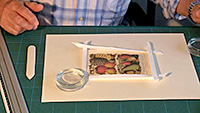
Conservation Framing: 6 - Paper Trays - Polygonal Edge Strips 5:19
The video proposes two ways to mount the artwork on the undermount without self-adhesive tapes that are forbidden in the conservation framing.
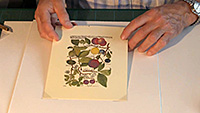
Conservation Framing: 7 - Float Mount 2:36
This video explains what to do if you want to mount the artwork on the undermount without hiding the edges.
Conservation Framing: 8 - The Inset Mount used for artwork on board 2:30
When the artwork is very thick there are some problems with the mountboard.
This video explains what to do in this case.
Conservation Framing: 9 - Mount Package 4:32
This video explains how to seal the sandwich formed by the glass, the mountboard, the artwork and the undermount.
Conservation Framing: 10 - Glass 3:07
The damages caused by the light are the most important problem in conservation framing.
The video shows which are the advisable types of glass.
Conservation Framing: 11 - Spacers - Sealing of rebate 4:44
The wood of the rebate should not touch the artwork.
The solution can be a spacer. If there is no spacer the rebate should be sealed with an aluminium tape.
Conservation Framing: 12 - The Back of the Frame 3:49
The video shows what concerns the back of the frame: backing board, protection paper and bumpers.
Conservation framing: 14 - The necessary materials 8:27
This video explains the characteristics of the materials provided by Rinaldin used for conservation framing.